Showing posts with label Kids. Show all posts

July 23, 2012

Eloise Birthday Party

Hey, hey!!  

I hope everyone has been having a lovely July!!  I know I have.  :-)

This past weekend, I helped a co-worker with her sweet daughter's birthday party.  She turned six and loves Eloise, so we Googled other Eloise birthday parties we had seen online, and used that inspiration with a few touches of our own.   

For the favors, a candy bar seemed just the thing for this party.  (Note the runner -- it's just pink and white polka-dot wrapping paper.  Cute and budget-friendly!)


From left-to-right, there were Rice Krispies treats made with pink marshmallows.  To make wrapping them easier, I suggested lollipop sticks, and they were tied with pink and black curling ribbon.  That's my pretty little cake pedestal underneath.  


Next (and possibly my favorite) was the cotton candy tower.  I found the mason jars (12 for $7.99) and the cotton candy at local grocery stores.  After filling each jar, I covered the top with a small square of pink-and-white polka dot wrapping paper, then tied with zebra-print ribbon.   The tower itself was all Jayson's doing.  He's creative, too!

*  Note:  Do this as close to the event as
possible so that the cotton candy stays fresh!


The cake was made by someone she knows who produces things like this from her kitchen.  Isn't it awesome?


I also put pink and black gumballs in little bowls.  (The birthday girl thought the black ones were olives!)


Next came my signature candy bags.  We selected things like Flying Saucers, Tootsie Rolls, Good n' Plenty, Gummy Watermelons, etc.  Anything pink, anything black.  


Finally, iced animal crackers (made exactly like the candy bags.)


For the actual favor bags, I took white bags from the dollar store (2 for a buck, if you can believe it!).  They're rather large because I knew they would have to carry mason jars.  I cut small slits on either side, and tied the curling ribbon through it.  The little labels I printed right from my computer onto scrapbook paper.


For decorations, we used streamers and balloons (which I think are highly underrated), along with some tissue paper pompoms I made myself.  I used a Martha Stewart idea (though I tweaked it a little.)  Seriously, these things are awesome.  I will post a tutorial entirely for them another time, but for right now, just "ooh" and "ahh" at them in the pictures.  ;-)


I made a little banner for over the candy bar.  (Here is my tutorial on how to make one.)


A close-up of one of the pompoms.  Isn't it adorable?


(Decorations Total: less than $30.  What!!)

For a game, she had an Eloise picture blown up, and they played 'pin the bow on Eloise' (a cute little switch on the classic pin-the-tail.)


And finally, a picture of the hat I purchased at the dollar store and dressed up as a gift to the birthday girl.  She was stylin', let me tell you.


What parties have you been to lately?

~ Sarah

September 26, 2011

Safari Sleepover

It's Monday, and I survived the sleepover!   It was certainly a fun time for the girls.  We made camo binoculars out of toilet paper rolls and construction paper, ate some safari foods, and watched Nim's Island while eating popcorn from the homemade popcorn bags.  One of our leaders shared a devotional about children in Africa and how we can help them from here, and the girls asked some wonderful questions. 

Here are some photographs of the decorations and treats.

I covered a plastic white tray with leftover zebra-print wrapping paper and cheeta duct tape (yes, patterened duct tape!!), and wove an animal-print ribbon through the cake pedestal.   For a take-home treat, I made little candy bags (tutorial here) with trail mix and animal-patterned cardstock.


And as for the decorations... well, take a look:


Faux waterfall made from tulle


Some of the circle party streamers


All-in-all, it was a huge success!  : )

~ Sarah

September 23, 2011

Homemade Popcorn Bags Using Wrapping Paper

The day of the Safari Sleepover is here!

I was up late last night making sure everything was ready and packed, and going over my to-do list again and again.  Nevertheless, I can say with a large degree of certainty that something will be forgotten, but I can say with an even larger degree of certainty that it won't matter much.  Things have a way of proceeding despite a forgotten detail.  :)

Well, no matter what decoration or activity I managed to forget, at least the movie at the end of the night will be in theme.  Last year, I made popcorn bags for a movie night I was having with the girls, and have been making 'in theme' popcorn bags ever since.  I thought I'd share a tutorial on how I make them, as they are easy, and certainly a nifty little touch.  (Sorry... I can't do tutorials without lots of pictures... comment if something isn't clear!)

I found my supplies at Party City... zebra print wrapping paper, and leopard-print gift bags.  It's certainly cheaper to make them all out of wrapping paper, but I wanted a little bit of variety so I made an exception.  ;)

I cut the wrapping paper into 10 x 15" pieces.  The shorter side will be your bag height (less 2 1/2" for the bottom).


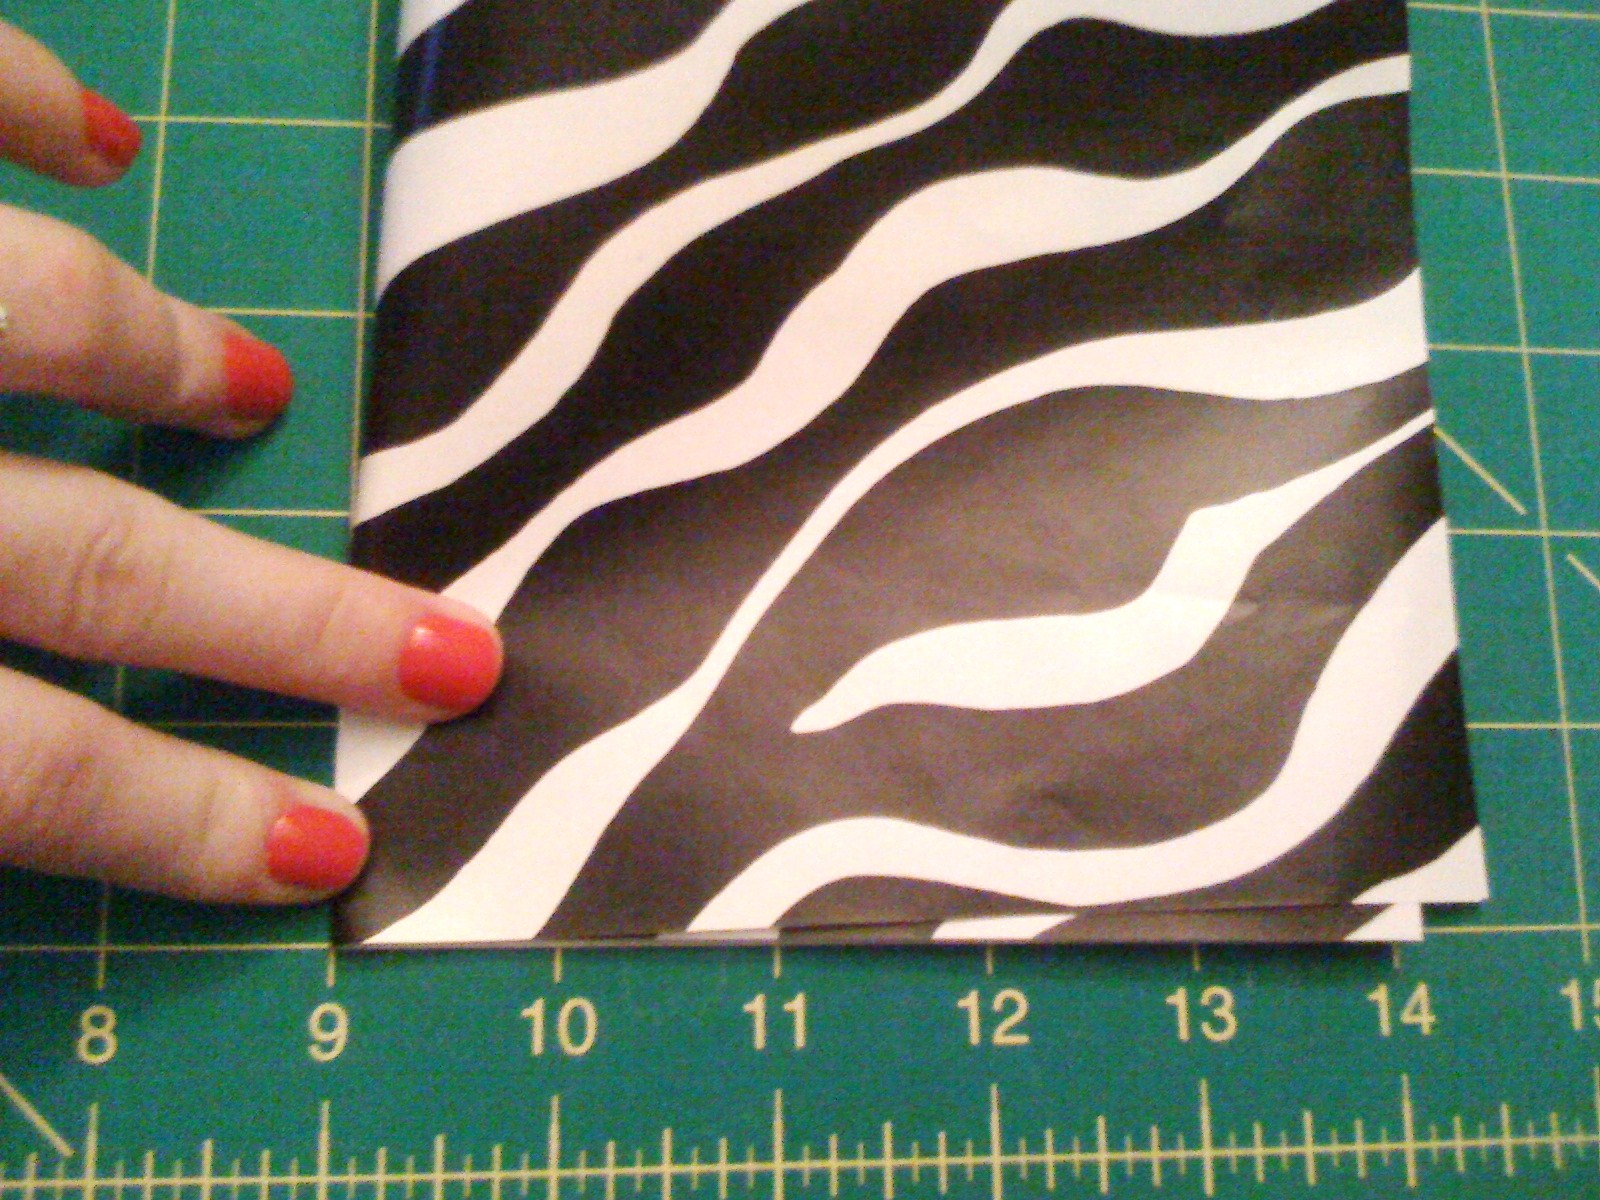
Next,  fold a strip at the bottom of the bag 1 1/2" wide.  Once you've creased the fold, open it back up.


Fold the bag edges so that the front of the bag is 5" wide.  The edges should overlap quite a bit.


Fold both edges back on themselves, leaving a 1" fold, then fold them back over themselves again, making a 'zig-zag' on each side


(This is what your bag should look like when both sides are folded properly...)


Pressing the bag flat, tape along the top where both sides meet.


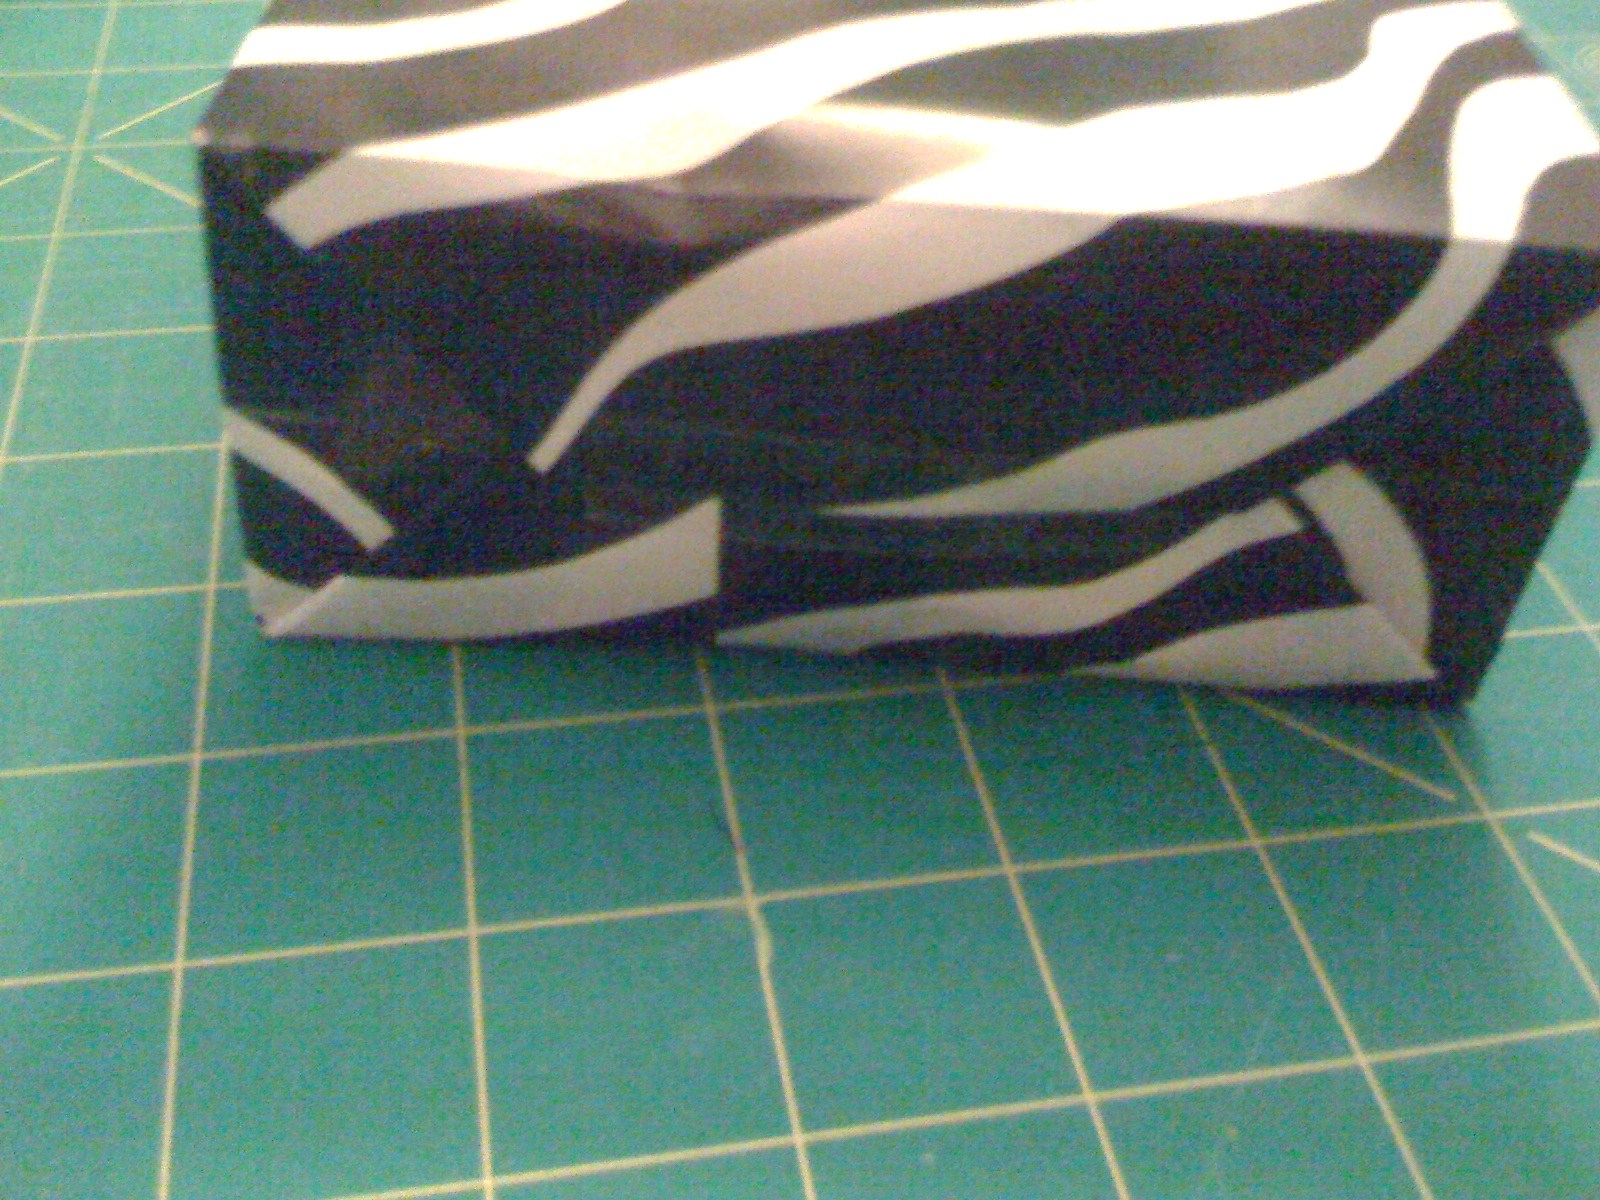
The bottom of the bag is the trickiest part.   Using the crease you folded in the beginning, fold the sides, press the corners, and then fold the top and bottom in (exactly as if you were wrapping a present.)  Tape them together.


It's a bit difficult to see, but this is the inside of the bag.  (I used tape inside, as well.)


To fold the bags so that they store more easily, press the top edges together, and slowly work your way towards the bottom, smoothing the paper as you go (as though you're ironing it.)


The bottom should fold naturally. Press the bottom to crease the folds properly.


That's it!  You're done!  It took me about an hour and a half to make 15, but I took my time, watched a movie, took breaks, etc.  It really isn't very time-consuming if you commit yourself to the task (which I rarely do.)  For the gift bags, I just removed the handles (and saved them for a future project... I'm sure I'll use them at some point.)  Here are all the finished popcorn bags:


Don't they look fabulous??  I tell ya, we are going to be movie-ing in styyyyyyyyle tonight.  :)

~ Sarah


PS:  If you are having trouble getting the bottom to work for you (believe me, it's tricky at first) you can use this idea instead.  Fold the bottom over on itself twice, then tape.  This is a much faster method, but the bags don't stand up, and children inevitably get popcorn everywhere (not that my dog minds this problem...)  :)

September 19, 2011

Sleepover Plans

Hey, everyone!

Well, according to the LwYH calendar, it's Autumn, and the weather certainly agrees with me.  It was like someone flipped a switch, and overnight we went from summery, hot days to cool, breezy, crisp air.  I love it.  : )

I've also been a little quiet lately, which you may or may not have noticed.  I'm busy planning a sleepover for my girls' group at church.  I don't pick the themes, as they are selected by the national directors and their staff, but I DO run with them. 

Any guesses what this year's theme might be?  These are some of the decorations and essentials I picked up this weekend.


Happy Autumn!  <3

~ Sarah

September 7, 2011

Back to School

It's that time of year... new backpacks, new shoes, clean outfits, high hopes... the fear and drudge of homework hasn't set in yet, and bright yellow school buses streak through the landscape. 

I am not a teacher or a parent, but I do volunteer for the girls' club at our church, and tonight is our first day back for the year, which means that I am not immune to the "back-to-school bug".  A few weeks ago, I saw this back to school 'dessert' table on Amy Atlas's blog, and it was soooo awesome that I wanted to try a couple of her ideas.


My pencil cake looks very sad compared to hers (I even put the pencils the wrong direction.  lol)  But I was exceptionally pleased with the eraser taffy.  I just wrapped an eraser in a piece of white tissue paper and twisted the ends.


Not a very creative post, but I wanted to celebrate the start of school in some small way.  ;)  Any back-to-school stories to share??

~ Sarah

August 1, 2011

The Cake Decorating Party

Blogcation (blog-KAY-shun): noun.  An absense from blogging on the part of the blogger, sometimes planned, sometimes unplanned.  This one was unplanned.  I'm sorry I've been neglecting you lovely Readers, but you'll see why today. 

On Saturday, I planned and executed a birthday party for a lovely 12-year-old girl.  She actually had attended the Pink and Green birthday party last month, and booked her party the very next day.  While pink and green are her very favorite colors, she decided that she also wanted her theme to be cake decorating.  So I went to town!!

She had a relatively small group coming - only 10-12 girls - so I thought I could make it a little more special and intimate.  Instead of little cupcakes, I made each girl a 4" funfetti cake (using a spring form pan from AC Moore).  And just look at what I placed them on...


These glass cake pedestals were the creation of the lovely and talented Strawberry Chic designer.  Her original post can be seen here.  All you need are glass candle holders and plates from the dollar store, and clear Gorilla glue (I purchased mine at AC Moore for $3.99).  Then I placed a 6" doily on each pedestal.
Suggestion:  make these outside.  My house smelled like the glue for days.


I placed pink and green icing in decorator bags.  (Note that I didn't bother using tips.)  I merely cut different designs into the bottom of the bags, and they passed around the shapes they wanted.  Also, I stuck with two icing colors (as well as a basic white that they initially frosted with) and pastel non pareils.  I also used lovely little flowers that my wonderful friend Katie Scoda made for me.


And, they went to town!


I love how unique all their little cakes turned out to be. 


Once they were finished, I had them each decorate a box to take home.  While they ran off to enjoy water balloon fights, I tied a red and white string around each box (so it looked like it came from a bakery).  It was such a delightful, fun activity.  And the birthday girl loved it, which is by far the most important.  :)


Also, I'll talk about those aprons (yes, I made them) another day.  :)

~ Sarah