April 29, 2011

Potted Plant Gift


Happy Friday, all! 

I wanted to share a quick, easy idea that turns a store-bought gift into something a little more personal.  I have a dear friend who recently learned that her grandfather is not doing well, and so I wanted to give her something pretty to brighten her day.

I found this gorgeous, blue hydrangea at the store, and thought it would be perfect, except for the gaudy, shiny green paper that it came in.

I instantly planned to do a quick makeover when I got home.

I love the vibrant colors of the blue hydrangeas.  So pretty!


Then, I dove into my vast collection of wrapping supplies, found a cheery, pretty paper and a soft cream ribbon.  I didn't measure the paper... I more-or-less "eyeballed" it.  Always go with much more than you think you'll actually need, as it's easier to cut after the fact than have to start over.   

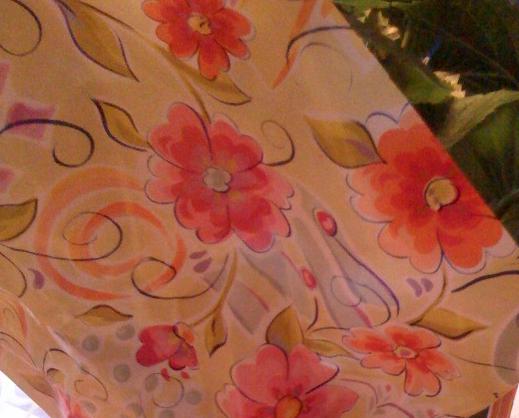
I'm pretty sure this paper came from Party City, although
Target also has a number of beautiful papers on hand.


Make sure you leave the store paper on the plant!  This is important because the paper is designed to contain moisture, and your wrapping paper is not.  If you like, you can trim the paper down to the size of the pot before covering it, but I didn't bother (I knew I had enough paper to completely conceal the green.)

Next, just gather the pretty paper up around the pot and tie the ribbon to hold it in place.  The easiest way to do this is to have someone help you (in my case, it was my fabulous hubby who rescued me).  If you want to tape it, you can, but it's not necessary. 


And there you have it!  A quick, beautiful gift to let someone know you're thinking of them that feels homemade when, in fact, it's just homefixed!

~ Sarah

April 28, 2011

Candy Bags

Looking for a unique but inexpensive favor to give away at your child's birthday party? Here is a fun idea that can be tailored for any theme and age - candy bags!
What you will need:
  1. Cellophane bags
  2. Cardstock (to match the party theme!)
  3. Assorted candy
  4. Scissors
  5. Stapler
First, decide how big you want the bags to be when they are finished (as in, how much candy you want each child to have.) I was pressed for time, so I had to use larger cellophane bags and trim them to size, but if you can find smaller ones, that will be much more convenient for you. (Find cellophane bags here.)  If you need to cut the bags, make sure you allow an extra 2-3 inches on the top for folding down.

Next, cut your cardstock into pieces to fit the top of the bag. You want them to be about 1/4" longer than the bag itself (in my case, I cut them 4" long), and 2" wide. Fold them length-wise. {* One note I will add - be sure that your cardstock is thick. If it's not, then the staples do not pull off easily and can become dangerous for little fingers.}

Now, fill the bags with the candy you've selected (be sure to wash your hands!) If you are fortunate enough to have a second pair of hands, create an assembly-line style with one person filling the bags and the other folding the top down and stapling the cardstock.

Finally, label the candy bags so that the kids will know what they're getting (I labeled mine on the back.) This is especially important to help reduce the risk of allergy disasters!


I placed mine in various "cute" dishes I already had, but they would look just as fun on one big tray together, if you don't have dishes handy.


While my candy bags make a very girly display (it was for a movie night I hosted for my girls), you can get creative with the cardstock and make it match any party you wish. If you are extremely ambitious, you can even pick candy that will match the colors of the party.


{I'll talk about that banner another day.}  :-)

Enjoy!

~  Sarah

Today, I Celebrate "I Can Do That!"

Today, I finally do what I've wanted to for quite some time -- I create my own blog! 

Confession: I am a blog stalker... I have a number of favorite blogs that I follow all the time, and have actually caught myself feeling very frustrated when they take too long to post something new.  When they do, I pour over their words, pictures and ideas until I've practically memorized what they have to share.  I seem to only enjoy the blogs that dabble in many things: pictures of anything, little thoughts, and especially designs and tutorials.  I think they're the most fun because you never know precisely what you'll be expecting when you find a new post.  I've decided to try it!

The beauty of artistic blogging is that it inspires you to do things all your own.  You can take an idea, doctor it up a bit, and voila!  You have something fresh, new and original!  In this way, I have done a number of my fun projects.  I take an idea from a Jedi master, use the force, and create my own {and probably, the masters have done the same for some of them!}

So, we'll see how this goes.  Please let me know if you enjoy my blogs, and give me any tips for other blogs I might enjoy in return!  Remember -- I love fresh, unique, beautiful, creative... when you come right down to it, I tend to like a lot!!

~ Sarah

PS:  What's in a name? 

Did your mother ever tell you to 'look with your eyes'?  Any artist knows that you cannot truly experience something without looking with your hands, as well.  I adore my mother, but it's one of her lessons that I decided not to learn... on purpose.