Showing posts with label Gifts. Show all posts

December 22, 2011

Dollar Store Spa Baskets

Three days until Christmas!!  On a scale of happy and merry to panic, where are you in your preparations?  I'm not quite finished, but it doesn't seem to be bothering me as much this year as in Christmases past.  I must be dialed in to that peace on earth thing.  ;)

We had our Christmas party for our church girls' group last night, and it went alright.  Anarchy and chaos, especially with my lost voice, but still a good time.  The club that I teach has between 10-12 girls every week, and we wanted to give them something special for Christmas.  Special, but not too expensive (let's face it... $10 per girl for 12 girls adds up very quickly!)  So we came up with these spa baskets.  Perfect, really, since two months ago we had a spa night, and the girls loved it.

Most of the items in the baskets were from the dollar store (manicure set, lotion, bath roses, loofahs, and beauty blotters.)  We did find good deals on nail polish and lip glosses at Party City, and in the end, we spent roughly $6 per girl, and the baskets were far nicer than anything we found online or in the other stores.  I wrapped them in tissue paper, then cellophane, so they looked much more professional than they actually were (oops - forgot to take a picture of the wrapped baskets.)

I tried to make the baskets color-themed (like blue and pink, or pink and purple, etc), and then the girls traded the items they received with each other for the colors they wanted.  They all loved them (one girl said, "Yes!  I got lady things!")  What great gift ideas do you have that are also budget-friendly?


Happy December 22nd!


~ Sarah


July 7, 2011

Pretty Little Tote

Good morning!

Before I even begin this blog, you need to know that this is not an original idea.  I saw it on one of my favorite blogs, Such Pretty Things, and it inspired me.  You can find the original idea link here.  However, in case you don't want to navigate away from this page, I will tell you a little bit about the original post.  Jessica, the amazing and talented SPT blogger, journeys to her local Target fairly frequently, almost always finding a delightful treasure, which she often makes even delightful-er.  That is where this idea came from.  She found a cute little tote at the bargain corner in Target, and hot glued some flowers to it.

I copied the inspiration.  I found the same tote, in the same store, for $2.50.  I wasn't planning to copy her idea, but I was there, the tote was right at eye-level, and for that price, I couldn't leave it behind.

So, without further ado, here is Jessica's idea on LwYH:


Aren't they just splendid?  I can't get over how well they turned out.  I had planned to give them as gifts, but it's going to take me a while to work myself up to parting with them.

What you will need:
  1. Tote
  2. Hot glue gun
  3. Silk Flowers, gems, buttons, beads, etc. (use your imagination!)

TOTE 1:

I used dainty little flowers and gems I had purchased as 'table decor' in the bridal section at Michael's.  I hot glued the flowers, then added the gems to the center.  Always a fan of ribbon, I added a little one to the bottom.


front
back
 TOTE 2:

I used leftover silk petals from a wedding I did recently.  I wasn't really sure what I had intended it to look like, but I was blown away by how lovely it turned out to be.  I think I had originally planned to put several of these unique flowers, but after one, I thought it looked finished (and it's probably my favorite of the two.)  :)


So, I hope you can become inspired by this, too, and make your own creative little bag.  And thanks, Jessica!  :)


~ Sarah

July 1, 2011

Pretzel Wreaths

Hey, Readers!

I had intended to save this post until we get closer to Christmas, but it's a long way away, and I have nothing else prepped for posting.  It's not exclusively a Christmas gift, I suppose, but since I made them at Christmastime, I can't get it out of my head that they're Christmas-y.  In my opinion, the perfect atmosphere for a craft like this includes a cup of hot chocolate and "Sleigh Ride" playing in the background.  But I guess you could make it with iced tea and "Put Me In, Coach".  :)

I gave these away to our closest friends as a little 'treat'.  They're perfect for kids' gifts (as in, gifts they give to teachers, assistants, instructors, coaches) because they are fairly easy to make, and make a lovely presentation.  (It's also relatively inexpensive, and, well, let's face it... it's fun to get chocolate all over your hands.)

What you will need:
  1. Mini pretzels
  2. Cookie tray covered with wax paper
  3. Chocolate
  4. Double-boiler (or, if you're careful, a regular saucepan)
  5. Toppings (crushed peanuts, micro-mini-marshmallows, melted caramel, white chocolate, almonds, chocolate jimmies, etc...)
  6. Cellophane bags (optional)
  7. Ribbon (optional)
For each 'wreath', you will need 9 or 10 mini pretzels that are not broken.  To make the wreath, dip the bottom of each pretzel in the chocolate and lay flat on the wax paper.  Make one round layer of five, then another layer on top (of 4 or 5 - I preferred 5).  Before the chocolate completely solidifies, sprinkle your topping.  I found that caramel was by FAR the most popular (and, as I recall with a shudder, by far the most troublesome!)


 To give to friends, I put each wreath in a cellophane bag, and tied the top with a festive bow (sorry, didn't take a photo.)  They were absolutely lovely, and what's more, they were delicious.  


Happy Christmas in July!!

~ Sarah

April 29, 2011

Potted Plant Gift


Happy Friday, all! 

I wanted to share a quick, easy idea that turns a store-bought gift into something a little more personal.  I have a dear friend who recently learned that her grandfather is not doing well, and so I wanted to give her something pretty to brighten her day.

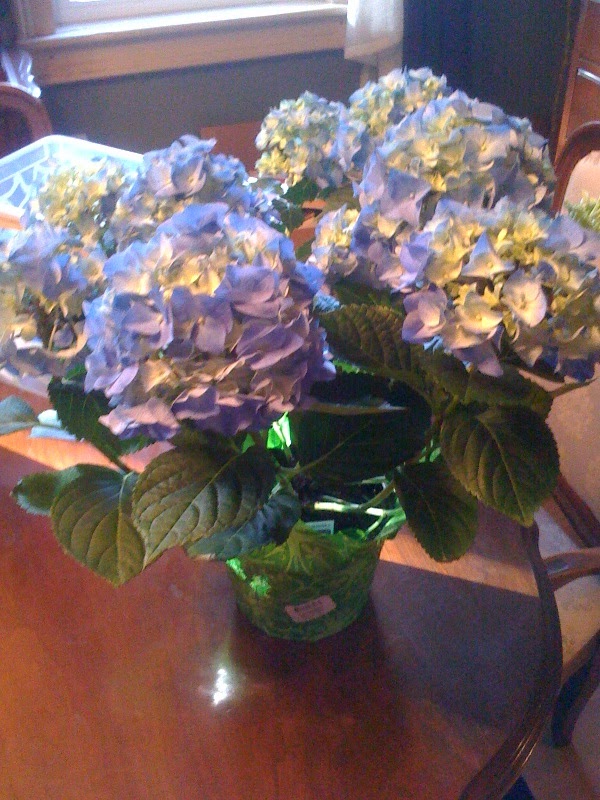
I found this gorgeous, blue hydrangea at the store, and thought it would be perfect, except for the gaudy, shiny green paper that it came in.

I instantly planned to do a quick makeover when I got home.

I love the vibrant colors of the blue hydrangeas.  So pretty!


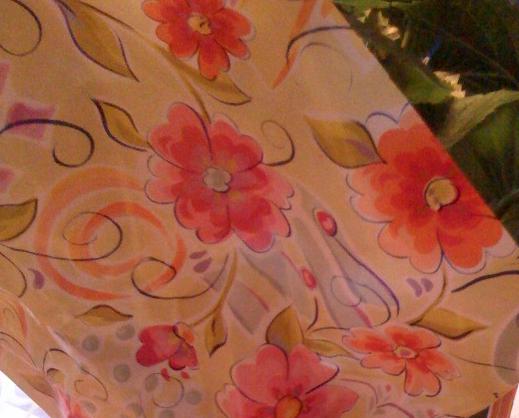
Then, I dove into my vast collection of wrapping supplies, found a cheery, pretty paper and a soft cream ribbon.  I didn't measure the paper... I more-or-less "eyeballed" it.  Always go with much more than you think you'll actually need, as it's easier to cut after the fact than have to start over.   

I'm pretty sure this paper came from Party City, although
Target also has a number of beautiful papers on hand.


Make sure you leave the store paper on the plant!  This is important because the paper is designed to contain moisture, and your wrapping paper is not.  If you like, you can trim the paper down to the size of the pot before covering it, but I didn't bother (I knew I had enough paper to completely conceal the green.)

Next, just gather the pretty paper up around the pot and tie the ribbon to hold it in place.  The easiest way to do this is to have someone help you (in my case, it was my fabulous hubby who rescued me).  If you want to tape it, you can, but it's not necessary. 


And there you have it!  A quick, beautiful gift to let someone know you're thinking of them that feels homemade when, in fact, it's just homefixed!

~ Sarah